In the realm of networking, WireGuard UI Docker Compose has emerged as a game-changer, providing a user-friendly interface and seamless integration for managing WireGuard VPN tunnels. Its intuitive dashboard and powerful features make it an ideal solution for both novice and experienced users alike.
WireGuard UI Docker Compose combines the strengths of WireGuard, a modern and secure VPN protocol, with the convenience of Docker, a containerization platform. This combination empowers users to create, manage, and monitor WireGuard tunnels with ease, ensuring secure and reliable network connectivity.
WireGuard UI Docker Compose Overview
WireGuard UI Docker Compose is a convenient tool that simplifies the deployment and management of WireGuard VPN servers. It provides a user-friendly graphical interface for managing WireGuard configurations, making it accessible to users of all technical levels.
The main components of WireGuard UI Docker Compose include the WireGuard server, the WireGuard UI web application, and a Docker container that hosts both components. The WireGuard server handles the encryption and tunneling of network traffic, while the WireGuard UI web application provides a user-friendly interface for managing WireGuard configurations.
Benefits of Using WireGuard UI Docker Compose
- Easy to deploy and manage WireGuard VPN servers.
- Provides a user-friendly graphical interface for managing WireGuard configurations.
- Supports multiple WireGuard peers and configurations.
- Allows for remote access to the WireGuard VPN server.
Installation and Setup
Installing and setting up WireGuard UI Docker Compose involves following a few simple steps to get your WireGuard VPN up and running.
To begin, you’ll need to install Docker and Docker Compose on your system. Once installed, you can clone the WireGuard UI Docker Compose repository and navigate to the project directory.
Configuration
Configure the docker-compose.yml file to match your desired settings, such as the number of peers, IP addresses, and ports.
- Edit the WG_DEFAULT_INTERFACE variable to specify the network interface to use for WireGuard.
- Set the WG_DEFAULT_ADDRESS variable to define the IP address range for the WireGuard peers.
- Adjust the WG_DEFAULT_MTU variable to configure the maximum transmission unit for WireGuard.
Running the Containers
Once the configuration is complete, run the following command to start the WireGuard UI Docker Compose containers:
docker-compose up
-d
This command will create and start the necessary Docker containers, including WireGuard, the WireGuard UI web interface, and a database for storing user data.
Accessing the UI
Once the containers are running, you can access the WireGuard UI by navigating to http://localhost:3000 in your web browser.
Creating a WireGuard Tunnel
Creating a WireGuard tunnel using WireGuard UI Docker Compose is straightforward. Follow these steps to get started:
Generate Keys
Begin by generating a private key for your WireGuard interface. Run the following command:“`wg genkey | tee privatekey | wg pubkey > publickey“`This will create two files: `privatekey` and `publickey`. The `privatekey` file contains your private key, which should be kept secret.
The `publickey` file contains your public key, which you can share with others.
Set Up Peers
Next, you need to set up peers for your WireGuard tunnel. A peer is another device that you want to connect to using WireGuard. To add a peer, click on the “Peers” tab in WireGuard UI and click on the “Add Peer” button.In
the “Peer” section, enter the following information:*
-*Public Key
Enter the public key of the peer you want to connect to.
-
-*Allowed IPs
Enter the IP addresses that the peer is allowed to access.
-*Endpoint
Enter the IP address and port of the peer you want to connect to.
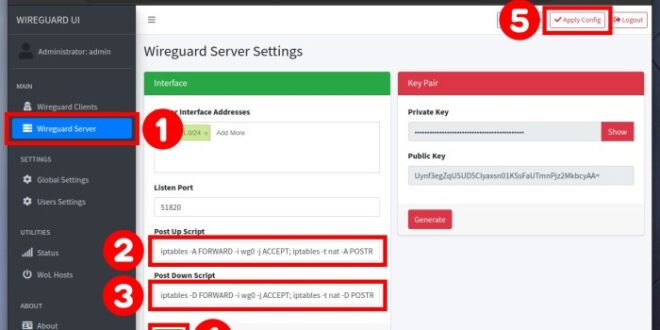
Configure Firewall Rules
Once you have added peers, you need to configure firewall rules to allow WireGuard traffic. To do this, run the following commands:“`sudo ufw allow 51820/udpsudo ufw allow 51820/tcp“`These commands will allow WireGuard traffic on ports 51820/UDP and 51820/TCP.
Connect to the Tunnel
Once you have configured your WireGuard tunnel, you can connect to it by clicking on the “Connect” button in WireGuard UI. Once you are connected, you will be able to access the resources on the other side of the tunnel.
Managing WireGuard Peers
WireGuard UI Docker Compose allows for the management of WireGuard peers, facilitating the addition, removal, and configuration of devices that can connect to the WireGuard network.
Peer Settings
When adding or modifying a peer, several settings can be configured, including:
- Name: A unique identifier for the peer.
- Public Key: The public key of the peer.
- Allowed IPs: The IP addresses that the peer is allowed to connect from.
- Endpoint: The IP address and port that the peer will connect to.
- Persistent Keepalive: Enables or disables persistent keepalive, which helps maintain the connection even when there is no traffic.
By managing peers effectively, you can control access to your WireGuard network, ensuring that only authorized devices can connect.
Monitoring and Troubleshooting

WireGuard UI Docker Compose provides several methods for monitoring and troubleshooting your WireGuard tunnels.
You can check the status of your tunnels from the WireGuard UI dashboard. The dashboard displays the status of each tunnel, including the connection status, IP addresses, and allowed IPs.
Using Logs
WireGuard UI Docker Compose logs can be used to debug issues with your tunnels. The logs are located in the /var/log/wireguard-ui directory on the host machine.
You can use the following command to view the logs:
tail
f /var/log/wireguard-ui/wireguard-ui.log
Other Tools
In addition to the logs, you can use other tools to troubleshoot issues with your WireGuard tunnels. These tools include:
wg: The WireGuard command-line tool can be used to manage and troubleshoot WireGuard tunnels.tcpdump: The tcpdump tool can be used to capture and analyze network traffic.wireshark: The Wireshark tool can be used to capture and analyze network traffic.
Customizing the WireGuard UI

The WireGuard UI can be customized to suit your preferences and requirements. You can change the appearance, add new features, and even create your own plugins.
One of the easiest ways to customize the WireGuard UI is to change the theme. There are several pre-built themes available, or you can create your own.
Themes
To change the theme, go to the “Settings” tab and select the “Theme” option. You can choose from a variety of pre-built themes, or you can create your own by clicking on the “Create New Theme” button.
When creating a new theme, you can customize the following settings:
- The primary color of the UI
- The secondary color of the UI
- The font family
- The font size
- The background color
Plugins
Plugins can be used to add new features to the WireGuard UI. There are a number of plugins available, including plugins that allow you to:
- Manage multiple WireGuard servers
- Create and manage WireGuard peers
- Monitor the status of your WireGuard connections
- Troubleshoot WireGuard issues
To install a plugin, go to the “Plugins” tab and click on the “Install New Plugin” button. You can then search for the plugin you want to install and click on the “Install” button.
Integrating with Other Services
WireGuard UI Docker Compose can be integrated with other services to enhance its functionality. These integrations can improve network management, security, and overall performance.One common integration is with DNS servers. By configuring WireGuard UI Docker Compose to use a custom DNS server, you can control the DNS resolution process and improve network security.
For example, you can use a DNS server that blocks malicious domains or provides ad-blocking capabilities.Another integration is with load balancers. Load balancers can be used to distribute traffic across multiple WireGuard tunnels, ensuring high availability and performance. By integrating WireGuard UI Docker Compose with a load balancer, you can create a highly resilient and scalable network infrastructure.
Security Considerations
Deploying WireGuard UI Docker Compose introduces potential security risks that require careful consideration. Understanding these risks and implementing appropriate mitigation strategies is crucial for ensuring the security of your WireGuard VPN.
One significant risk is the exposure of the WireGuard UI web interface to the public internet. This interface provides access to sensitive VPN configuration and management options. To mitigate this risk, it’s essential to restrict access to the UI using strong authentication mechanisms such as HTTPS with SSL/TLS certificates and role-based access control (RBAC).
Securing the Web Interface
- Configure HTTPS with a valid SSL/TLS certificate to encrypt communication between the UI and clients.
- Implement RBAC to restrict access to specific users or groups based on their roles and permissions.
- Enable two-factor authentication (2FA) for additional security.
Another security concern is the potential for unauthorized access to the Docker host. To mitigate this risk, it’s crucial to secure the host system by implementing strong firewall rules, regular security updates, and intrusion detection systems.
Securing the Docker Host
- Configure a firewall to restrict access to the Docker host only from trusted sources.
- Keep the Docker host and all software components up to date with the latest security patches.
- Install and configure an intrusion detection system (IDS) to monitor for suspicious activity.
Finally, it’s essential to regularly review and audit the security configuration of WireGuard UI Docker Compose. This includes checking for any vulnerabilities or misconfigurations that could compromise the security of your VPN.
Regular Security Audits
- Conduct regular security audits to identify and address any potential vulnerabilities.
- Monitor security logs and alerts for any suspicious activity.
- Stay informed about the latest security threats and best practices for WireGuard UI Docker Compose.
Advanced Configuration
WireGuard UI Docker Compose provides advanced configuration options to tailor the behavior and performance of your WireGuard network.
Custom DNS Servers
Configure custom DNS servers to specify which DNS servers your WireGuard clients will use. This allows you to control the DNS resolution process and improve privacy and security.
Static Routes
Set up static routes to specify specific paths for traffic to take. This can be useful for optimizing network performance or routing traffic through specific gateways.
Performance Optimization
Optimize WireGuard performance by adjusting settings such as MTU (Maximum Transmission Unit) and encryption algorithms. This can help improve network throughput and latency.
Additional Resources
Explore additional resources for further information and support on WireGuard UI Docker Compose.
Documentation
Refer to the official WireGuard UI Docker Compose documentation for comprehensive information on installation, configuration, and usage.
Tutorials
Find helpful tutorials online that provide step-by-step guides on setting up and managing WireGuard UI Docker Compose.
Community Forums
Join online community forums where you can connect with other users, ask questions, and share experiences related to WireGuard UI Docker Compose.
Closing Summary

In summary, WireGuard UI Docker Compose is an invaluable tool for anyone seeking a robust and user-friendly VPN solution. Its comprehensive feature set, ease of use, and security-first approach make it an indispensable choice for individuals and organizations alike. By leveraging the power of WireGuard and Docker, WireGuard UI Docker Compose empowers users to establish secure and reliable network connections, unlocking new possibilities for remote work, secure communication, and seamless network management.