In the realm of secure and reliable VPN connections, WireGuard emerges as a formidable contender, renowned for its simplicity, speed, and cross-platform compatibility. When combined with Clash, a versatile VPN client known for its customization capabilities, users gain an unparalleled level of control over their network configurations.
This comprehensive guide will delve into the intricacies of configuring WireGuard on Clash, empowering you with the knowledge to establish secure, high-performance VPN connections tailored to your specific needs. We will explore the essential steps involved, from interface configuration and peer management to firewall rules and routing optimization.
Configuration Overview
WireGuard is a modern and versatile VPN protocol that offers enhanced security, speed, and flexibility. Integrating WireGuard with Clash, a popular proxy manager, allows users to seamlessly access remote networks and bypass internet restrictions.
Setting up WireGuard on Clash is straightforward and provides numerous benefits, including improved online privacy, secure remote access, and optimized performance for gaming and streaming.
Step-by-Step Setup
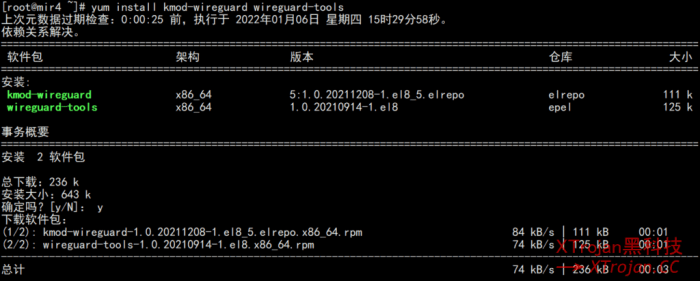
- Install WireGuard on your device.
- Generate a new WireGuard configuration file.
- Configure the Clash profile to use the WireGuard configuration file.
- Start the Clash service.
- Connect to the VPN server using WireGuard.
Interface Configuration
Configuring the WireGuard interface in Clash is a crucial step to establish a secure and private connection. Various options are available to tailor the interface settings according to specific requirements.
The WireGuard interface can be configured either through the intuitive Clash GUI or by manually editing the configuration file.
Using the Clash GUI
Within the Clash GUI, navigate to the “Profiles” tab and select the desired profile. Under the “Interface” section, specify the following parameters:
- Name: Assign a unique name to the interface.
- Listen Port: Choose a port number for the interface to listen on. The default port is 51820.
- MTU: Set the maximum transmission unit (MTU) size for the interface. The default MTU is 1420 bytes.
- DNS: Configure the DNS servers to be used by the interface.
Using the Configuration File
To configure the interface manually, edit the Clash configuration file located at ~/.config/clash/config.yaml . Add the following section to the file:
interface: name: “MyInterface” listen-port: 51820 mtu: 1420 dns:
1.1.1.1
8.8.8.8
Replace “MyInterface” with the desired interface name and adjust the other parameters accordingly.
Peer Configuration
Peer configuration in WireGuard allows you to establish and manage connections with other devices running WireGuard. By adding peers, you can create a secure network of devices that can communicate with each other over an encrypted tunnel.
To add a peer, you need to generate a public key for the peer and then add it to your WireGuard configuration file. The public key can be generated using the wg genkey command.
Creating a Peer Entry
Once you have the public key for the peer, you can create a peer entry in your WireGuard configuration file. The peer entry includes the public key, the IP address of the peer, and any other configuration options you want to apply to the connection.
Here is an example of a peer entry:
[Peer]PublicKey = 03189c17e6c2f078442629568338c52473821f08d0c293939f57c791d425e6a6AllowedIPs = 10.0.0.2/32Endpoint = 10.0.0.1:51820
The PublicKey field contains the public key for the peer. The AllowedIPs field specifies the IP addresses that the peer is allowed to access. The Endpoint field specifies the IP address and port of the peer.
Managing Peer Connections
Once you have added a peer to your WireGuard configuration file, you can manage the connection using the wg command. The wg command can be used to start, stop, and restart the WireGuard interface. It can also be used to view the status of the interface and to add and remove peers.
Here is an example of how to start the WireGuard interface:
wg-quick up wg0
Here is an example of how to view the status of the WireGuard interface:
wg show wg0
Firewall Rules
Firewall rules play a crucial role in WireGuard’s security by controlling incoming and outgoing network traffic. They allow you to restrict access to the WireGuard interface and protect your system from unauthorized access.
To create firewall rules for WireGuard, you can use the iptables command. Here’s how:
Allowing Incoming Traffic
-
- To allow incoming traffic from a specific IP address, use the following command:
iptables -A INPUT -p udp –dport 51820 -s 192.168.1.10 -j ACCEPT
- Replace 192.168.1.10 with the IP address you want to allow.
Allowing Outgoing Traffic
-
- To allow outgoing traffic to a specific IP address, use the following command:
iptables -A OUTPUT -p udp –sport 51820 -d 192.168.1.10 -j ACCEPT
- Replace 192.168.1.10 with the IP address you want to allow.
Blocking Traffic
-
- To block all incoming traffic to the WireGuard interface, use the following command:
iptables -A INPUT -p udp –dport 51820 -j DROP
-
- To block all outgoing traffic from the WireGuard interface, use the following command:
iptables -A OUTPUT -p udp –sport 51820 -j DROP
Routing Configuration
WireGuard requires specific routing configurations to establish communication between devices. This section explains how to configure routing for WireGuard, providing examples of how to configure routing tables and rules.Routing tables are used to determine the path that packets take through a network.
WireGuard uses the iptables command to configure routing tables. To add a routing rule, use the following syntax:“`iptables
- t nat
- A POSTROUTING
- o wg0
- j MASQUERADE
“`This rule will masquerade all traffic leaving the WireGuard interface (wg0) as if it originated from the host machine.Routing rules can also be used to control which devices can access the WireGuard network. To add a rule that allows only specific devices to access the network, use the following syntax:“`iptables
- A INPUT
- i wg0
- s 192.168.1.0/24
- j ACCEPT
“`This rule will allow all traffic from the 192.168.1.0/24 network to access the WireGuard network.
Troubleshooting
WireGuard on Clash may encounter various issues during setup and usage. Here are some common problems and their potential solutions.
Common Problems
- Peer is unreachable: Ensure the peer’s IP address and port are correct. Verify that the peer is online and has the correct configuration.
- No Internet access: Check the routing table to ensure that traffic is being routed through the WireGuard interface. Adjust the firewall rules to allow Internet access.
- DNS resolution issues: Configure custom DNS servers in the WireGuard configuration to resolve DNS queries. Alternatively, use a DNS service that supports WireGuard.
- Performance problems: Optimize the MTU (Maximum Transmission Unit) value to match the network’s capabilities. Experiment with different MTU values to find the optimal setting.
- Authentication errors: Ensure that the public and private keys used for authentication are correct and match on both peers.
Advanced Configuration
WireGuard on Clash offers a range of advanced configuration options to customize your VPN experience. These features enhance security, performance, and flexibility.
This section explores some of the advanced configuration options available in Clash for WireGuard and provides examples of how to utilize them.
NAT Traversal
NAT (Network Address Translation) traversal allows WireGuard to establish connections through firewalls and NAT devices. This is achieved by using techniques like hole punching and relay servers.
In Clash, you can configure NAT traversal by enabling the Enable NAT Traversal option in the WireGuard interface settings.
Multiplexing
Multiplexing enables multiple connections to be established over a single WireGuard tunnel. This can improve performance by reducing latency and increasing bandwidth utilization.
To enable multiplexing in Clash, set the AllowedIPs parameter to a range of IP addresses instead of a single address. For example:
AllowedIPs = 10.0.0.1/24
Performance Optimization
Enhance WireGuard performance on Clash by optimizing network settings, tweaking kernel parameters, and adjusting routing configurations. This guide provides practical tips to improve speed, stability, and overall network efficiency.
Kernel Parameters
Adjust kernel parameters related to networking and packet processing to improve WireGuard performance. Consider modifying settings such as:
- net.core.rmem_max: Increase the maximum receive buffer size for improved packet handling.
- net.core.wmem_max: Set the maximum transmit buffer size to optimize outbound packet processing.
- net.ipv4.tcp_wmem and net.ipv4.tcp_rmem: Adjust the TCP buffer sizes for improved network throughput.
Integration with Other Tools
Integrating WireGuard on Clash with other tools enhances its functionality and extends its use cases. By combining WireGuard with VPN clients and firewalls, you can create a comprehensive and secure network configuration.
Using WireGuard with VPN Clients
WireGuard can be seamlessly integrated with VPN clients such as OpenVPN and SoftEther VPN. This integration allows you to leverage the benefits of WireGuard’s advanced encryption and tunneling capabilities within familiar VPN client interfaces. For example, you can configure OpenVPN to use WireGuard as its underlying tunneling protocol, providing enhanced security and performance.
Using WireGuard with Firewalls
Integrating WireGuard with firewalls, such as iptables or UFW, enables you to establish granular control over network traffic. By defining firewall rules specific to WireGuard, you can restrict access to certain ports or IP addresses, ensuring that only authorized traffic is allowed through the WireGuard tunnel.
This integration strengthens the overall security of your network by preventing unauthorized access and potential vulnerabilities.
Best Practices
WireGuard on Clash offers robust security and performance, but implementing best practices enhances its effectiveness and longevity.
Securing your WireGuard connection involves employing strong encryption algorithms, such as ChaCha20 or AES-256, and regularly updating the configuration files to patch any potential vulnerabilities. Additionally, limiting access to the WireGuard interface and using a firewall to restrict unauthorized connections are crucial security measures.
Maintaining a Stable Connection
- Monitor the WireGuard interface regularly to ensure a stable connection. This includes checking for any errors or dropped packets.
- Consider using a WireGuard monitoring tool to proactively identify and resolve any issues that may arise.
- Configure automatic updates for Clash and WireGuard to ensure you’re always running the latest and most secure versions.
Last Point
Mastering the art of Clash configuration with WireGuard unlocks a world of possibilities, enabling you to safeguard your online presence, bypass geo-restrictions, and enhance your overall internet experience. Embrace the knowledge imparted in this guide, and embark on a journey towards secure and seamless VPN connectivity.